
Question 1
Draw up a list of the most important aspects of a product photograph. Refer to shadows, lighting, quality, ISO and editing in your answer. Mention at least five things.
Shadows: Make sure to look at shadows and what they can do for your photo, maybe you need more dramatic look with more contrast, you can use the shadows to help you with that. Depending what you are shooting and whats the goal shadows are one of the main variables you can play with to get different results.
Lightning: Lightning is everything, I’m not a experienced photographer but I do realize the importance of lightning and how lightning interacts with different materials. If you understand lightning you have come a long way. Just during this task the different lightning scenarios I tried could be the difference between night and day. I have a little experience with drawing and more so I have a little understanding of it but still a long way to go. I tried to firstly think up a lightning scenario that would suit the product I was shooting, if it was to get highlights on droplets or emulate a natural lightning scenario my first try was almost never the right one.
Everything you take a photo of is light, light bouncing of different materials at different angles, to get depth you need shadows and highlights. If you would have a perfectly even light around everything it would look very flat and dull. I say lightning is the most important part, and also very difficult.
Quality: Quality is VERY important especially with product photography, the photos should help sell the product. Just think when you look up a restaurant you don’t know and they have bad product photos. They might have 4.8 stars but another restaurant with only 3 stars have better photos, you tend to choose the one with better looking food photos even though you know based on the stars and reviews that the first one probably is better. Or when trying to find a movie on Netflix to watch, really good IMDB scores and good reviews but the cover doesn’t really talk too you, you choose another one.
So for a product photograph you should never sacrifice quality. It should look crisp, high quality and should never make the product look worse than it is, much rather the other way around.
ISO: This goes hand in hand with the quality. Product photographs should be shot with as low ISO as possible, like for me my camera only goes down to 200 ISO but DSLR/SLR usually goes all the way down to 100 ISO. You shoot with an low ISO to eliminate grains/noice from the photos. You want product photos to be smooth and high quality.
Editing: Make sure to shoot in RAW which is a format that saves all the data in the image which makes sure you can do some adjustments for exposure, white balance, hue etc, without loosing too much quality. I would say my images are a little too reliant on editing, but I did what I had to do with the light setup and material I could find and use for this task. So it can help you save situations but you should try to limit the editing, and rather take a new photo if it’s not good enough.
You can see my metal lid and the glass of beer, those are the ones I would like to reshoot with better lightning might do it tomorrow when the daylight is back here in Indonesia and I can make use of that with the other lightning.
Question 2
-
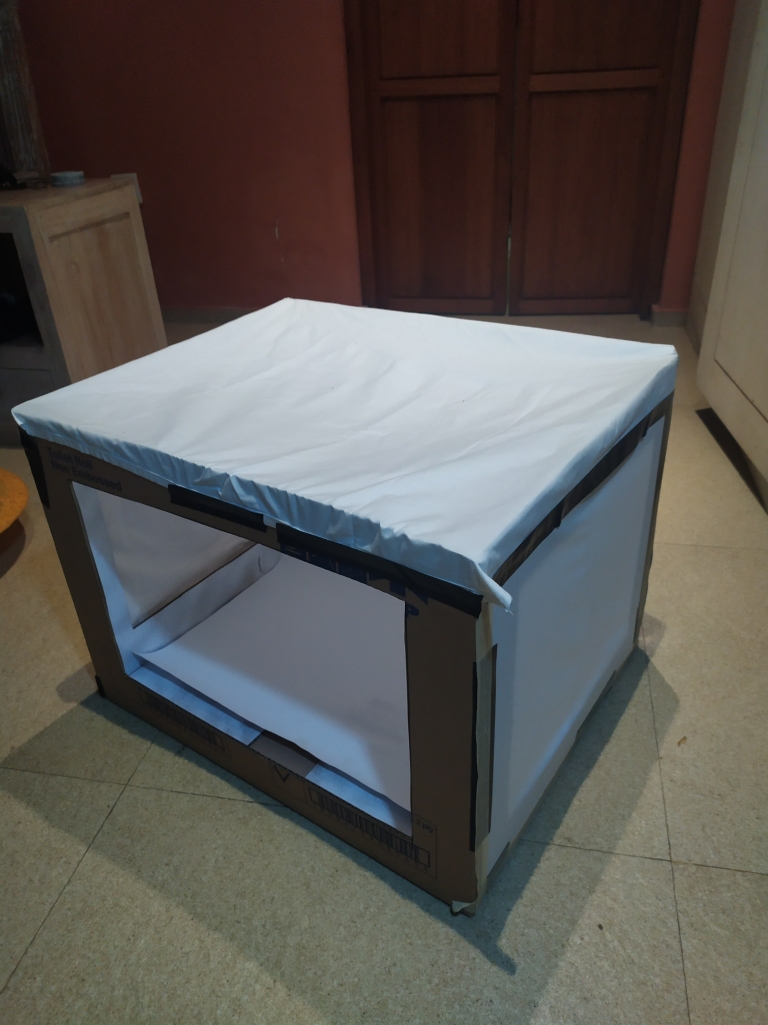
Make your own DIY light tent.
-
Take product photographs of the following objects:
-
Something fluffy, like a stuffed animal
-
Something shiny, like a knife and fork
-
Something hard, like a book or a mug
-
A liquid, like a glass of wine
-
-
Draw a diagram of your lighting scenario for each of the above photographs and submit it along with the photographs.
-
Edit your photographs with the software of your choice. Write an accompanying paragraph for each of your photographs and explain what you did during the editing process.
Something fluffy.

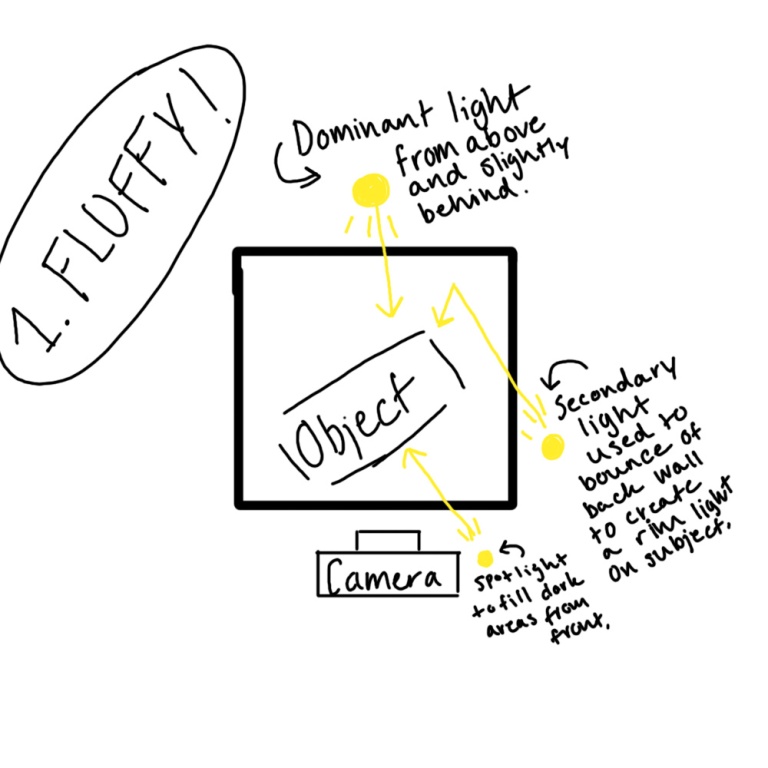
I shoot in raw and imported the image into Photoshop, the first thing I did was to adjust the white balance of the photo, later I went on to adjust some vibrance to separate the whites from the background. I also adjusted the blacks, whites, highlights and shadows. I finished in the raw editor by adding a little clarity and sharpening.
Later inside Photoshop I created three adjustment layer masks, one with darker shadows and one with lighter highlights, I proceeded to mask in and out areas where I wanted the highlights to pop, and the shadows to darken. I created contrast but just at my chosen areas, this to give it a little more interest and intensity but also to separate the white feathers and the subject more from the background and get more depth.
I also added a last Curves adjustment layer mask to work on the white background and get a smooth and clean white background. Masking areas where I don’t wanted brighter backdrop etc.
Almost forgot I also edited out some dust and specs from the background, edited out and refined some feathers that felt a little out of focus.
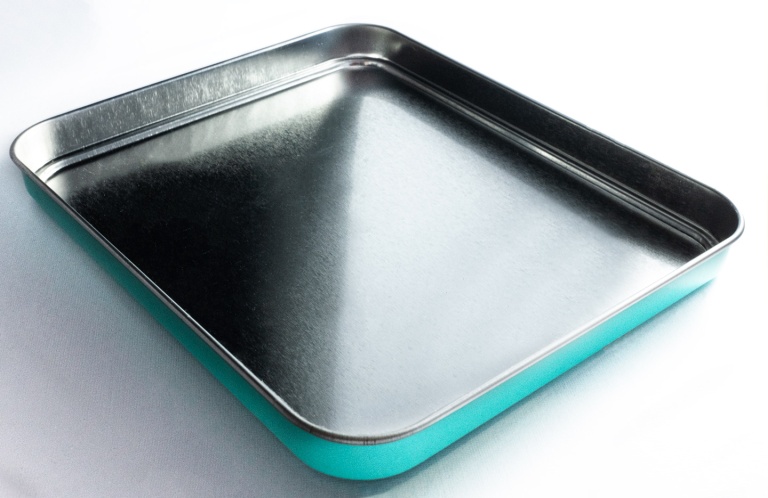
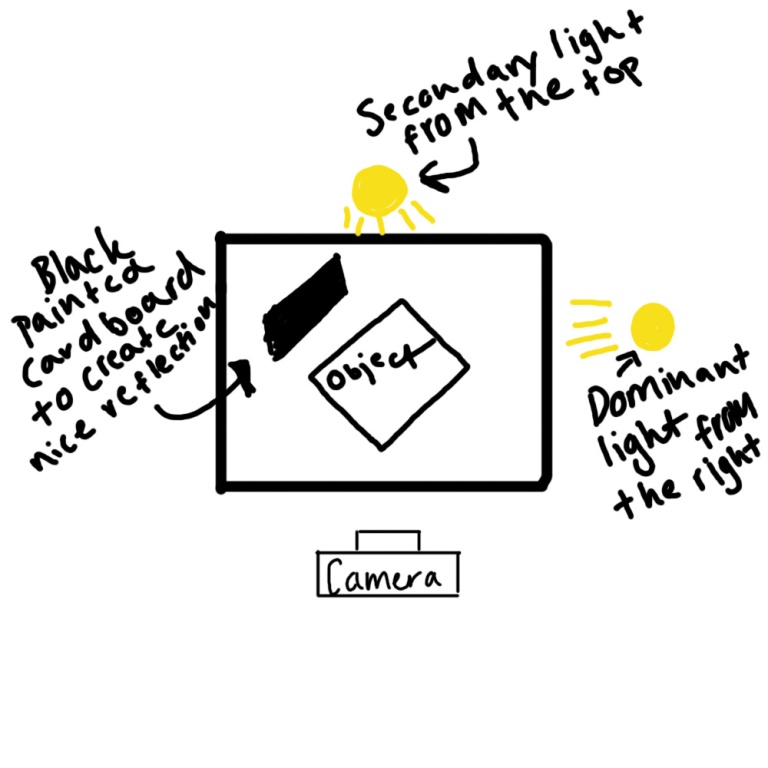
Shot raw again and imported to Photoshop where I adjusted the white balance, a little sharpening to get out a little of the texture in the metal. I also adjusted the shadows and highlights some to get more contrast out of the photo. I later also created some adjustment layer masks again to bring in highlights and shadows where I wanted exactly. I masked out some of the black cardboard that was in the shot, was my only way to get the reflection I wanted so I decided to just let it show a little in the shot and edit it out in post. I also cleaned up dust etc from the background. I also cleaned and made the metal look cleaner and better. Even though this was the least scratchy and bad looking shiny object I could find it was far from perfect, but in the end I got it looking alright.
The shadows are a little grainy not so bad when saved with higher quality but that was too big for use here, I tried to find sufficient lights here where I am I also went and bought some but the ones i bought was not strong and very warm in color.
I tried a few different but since I am in Indonesia and couldn’t find the good ones i was looking for I decided to use what I had and it wasn’t fully enough for this light setup.
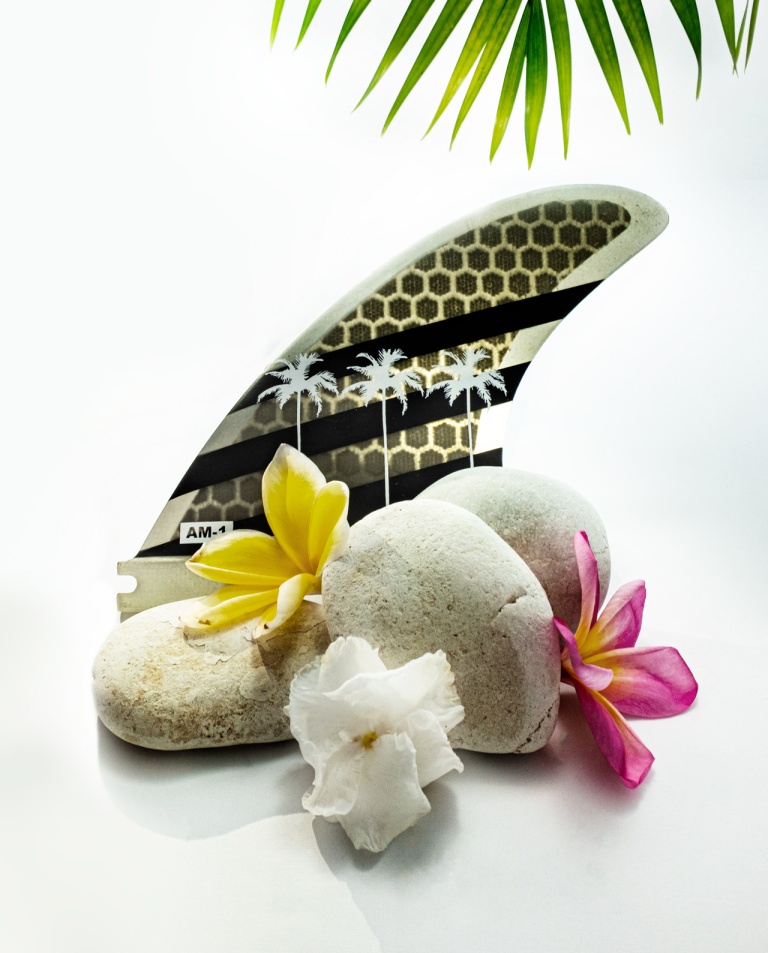
I used some props for this one I thought it would be challenging and a little fun to try. I’m mostly happy with it, the only thing that might be a little wrong is that the product is hidden behind a lot of stuff. But i still feel that it’s pretty clear whats the product and not.
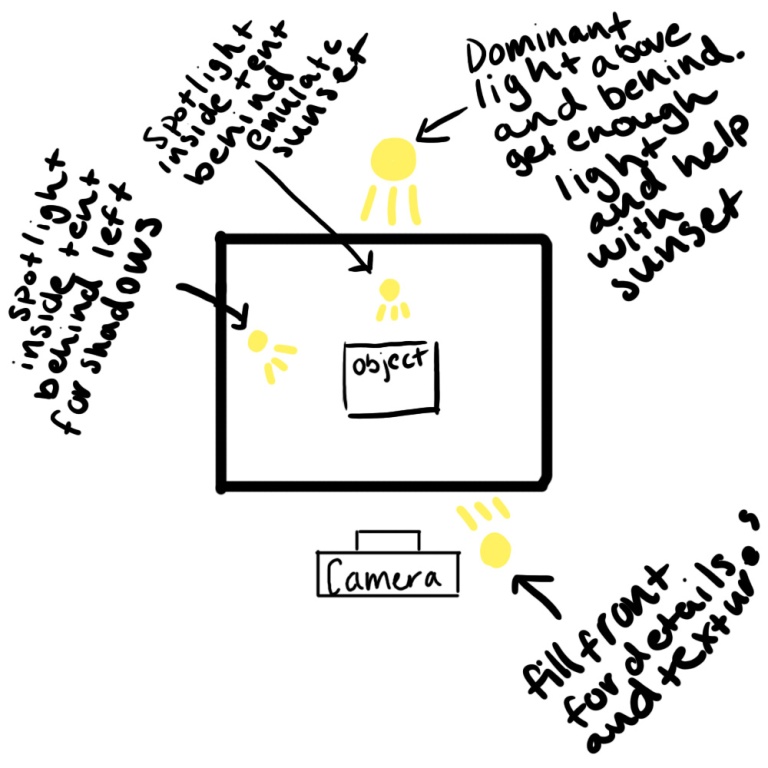
Same process with this one, shot in raw, imported to Photoshop and adjusted, a little warmer tone for this since I was trying to have the lightning feel like a sunlight from behind, like it was taken against a sunset. Thought it would suit the theme and ad to the overall shot. I did the same here with some different adjustment layer masks to dial in the highlights and shadows, bring back some detail and textures where I needed and so on. I also used two smartphones inside the light tent for spotlight as you can see on my diagram above so some parts of those had to be removed and replaced with background. Then remove dust, marks etc and balance the background to look complete again.
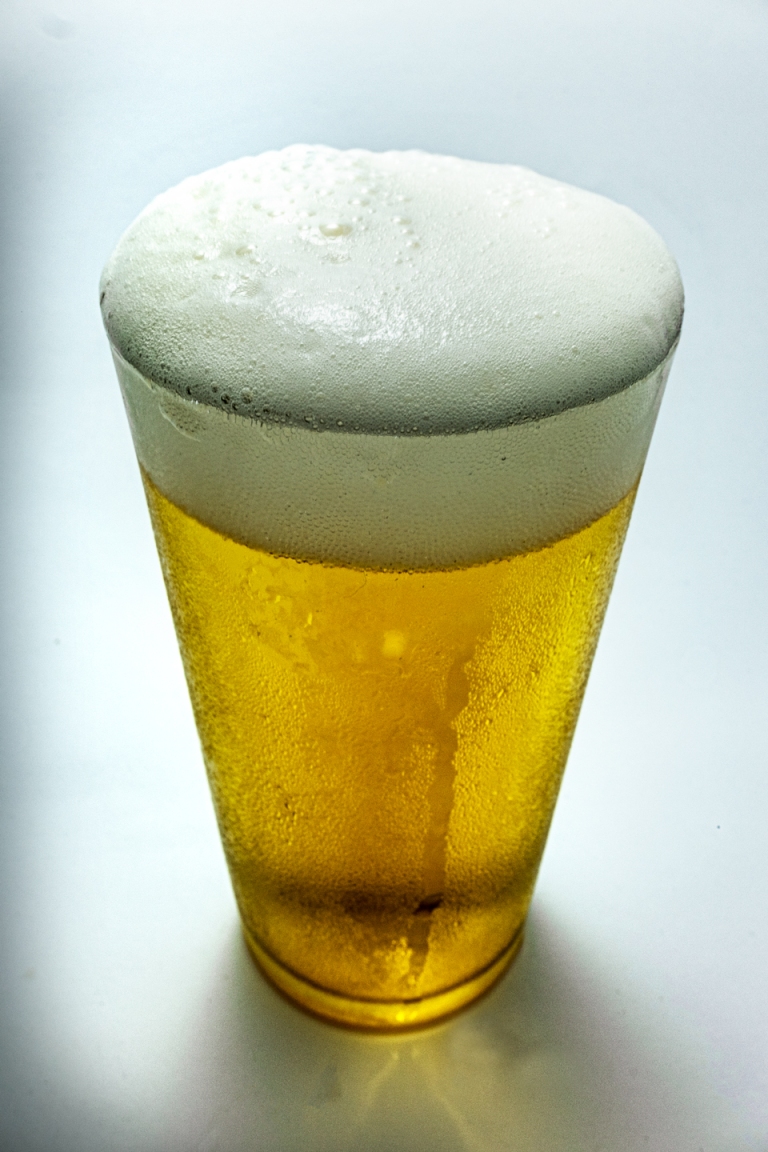
I really understand why food photography often involve other substances than the actual food. It’s a hassle to try and get some nice foam and condensation if you can’t control the variables more. A lot of drinking and pouring and quickly try to get a nice focused shot. Lucky for me it’s a Sunday so a little drunk is alright.
I’m the least satisfied with this shot I wanted it to feel like a glowing ice cold beer was waiting, but I shoot with a very wide lens 18.5mm and it’s not interchangeable and I didn’t have sufficient light, I tried to blast it with all lights I had but ended up lowering the aperture just a little, but enough to not get everything in focus. Since this is my last shoot and I’m finishing the task today (Sunday.) This is the best i could do. If i started this shoot yesterday and knew all this I would have taken it during peak daylight instead. I lowered the aperture to allow more light in the sensor so i could use a faster shutter speed the goal for this was to capture the rising bubbles in the drink, I also tried to dabble with the ISO but the images was just too “grainy.” So i consider this one a fail in the sense that i did not manage to take the photo i wanted.
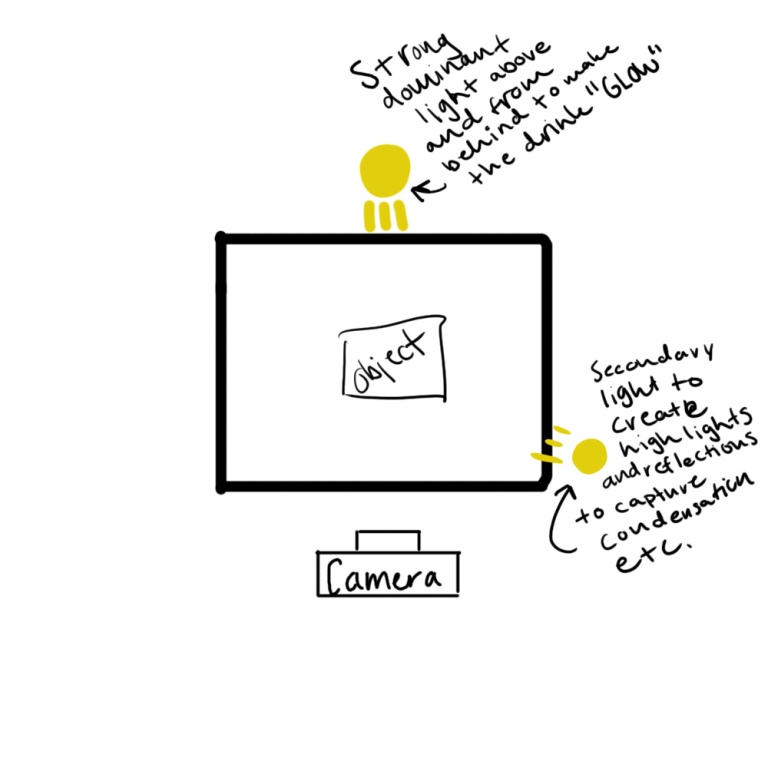
This was also shot in raw and edited the same ways as the others with Photoshop, main goal was to have the drink glowing but still not over expose, bring out the condensation and the foam (not the inside bubbles since i didn’t manage to capture them.) I think all three of those great focal points and help make the drink look desirable. But the focus was not really on point and the exposure especially for the background is not a 100% It looks better with quality but in this JPG form I’m not super satisfied.
